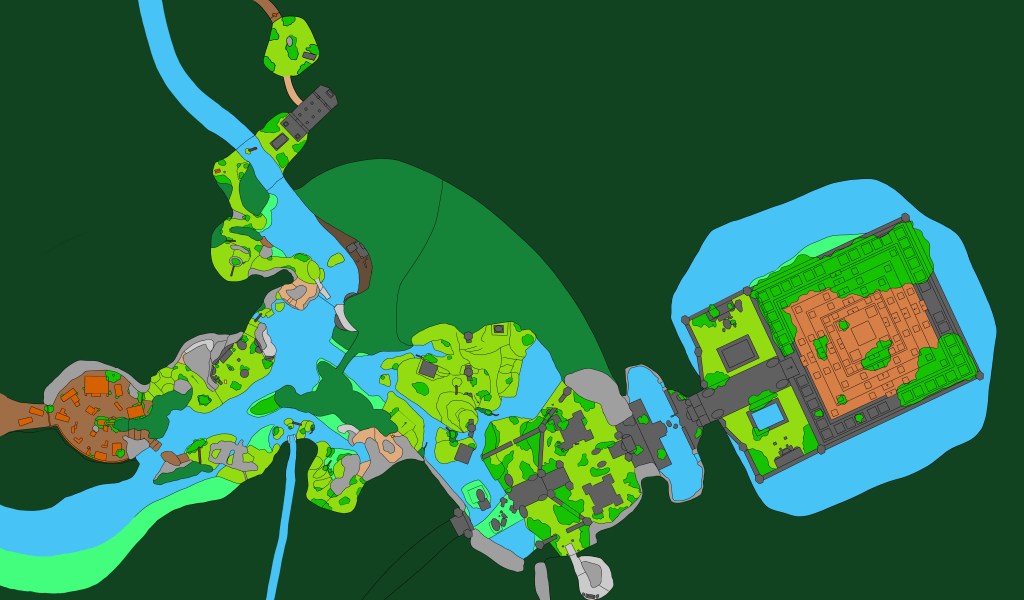
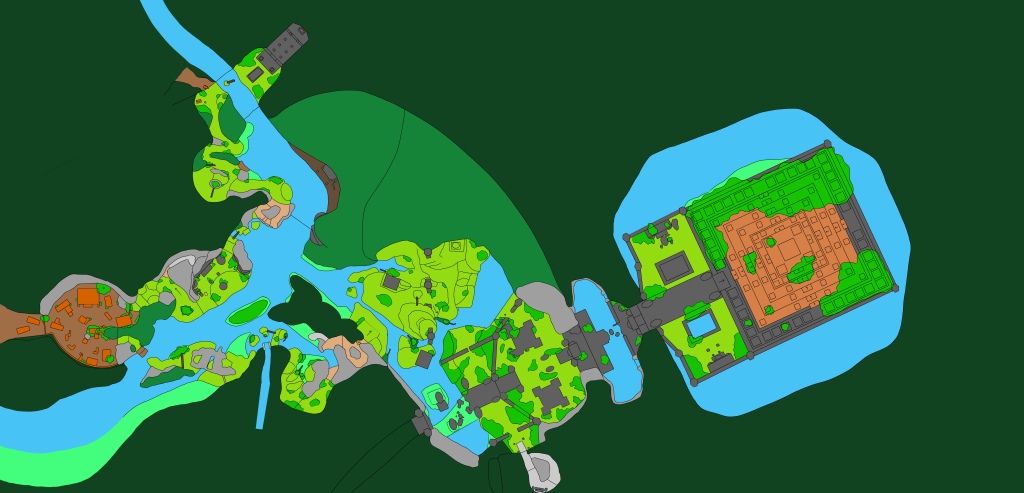
I began this week was spent acting on the feedback I received from last weeks playtesting session. I started by revisiting the 2D and reworking the beginning area, some players were confused as to whose campsite it was with some thinking it was the players rather than an old abandoned one. To make it clearer that this was an old abandoned one from previous explorers I moved the start position for the player to before the small temple. This also had the added benefit of taking the player into the temple first, giving them a cool reveal moment after they’ve been funnelled through the cave tunnel and exit in the open temply space. Making this temple area part of the golden path also meant more player were taking the time to explore the space and find the collectibles it held (fig 1).
Once I was done working out the new start area in 2D I started updated the level based on the rest of the playtesting feedback. I added in the new the beginning area, directing the players through the first small temple so that they would then stumble across the abandoned campsite. As part of these changes I also added in additional tents to make it clear it was for a bigger party than just the solo player.
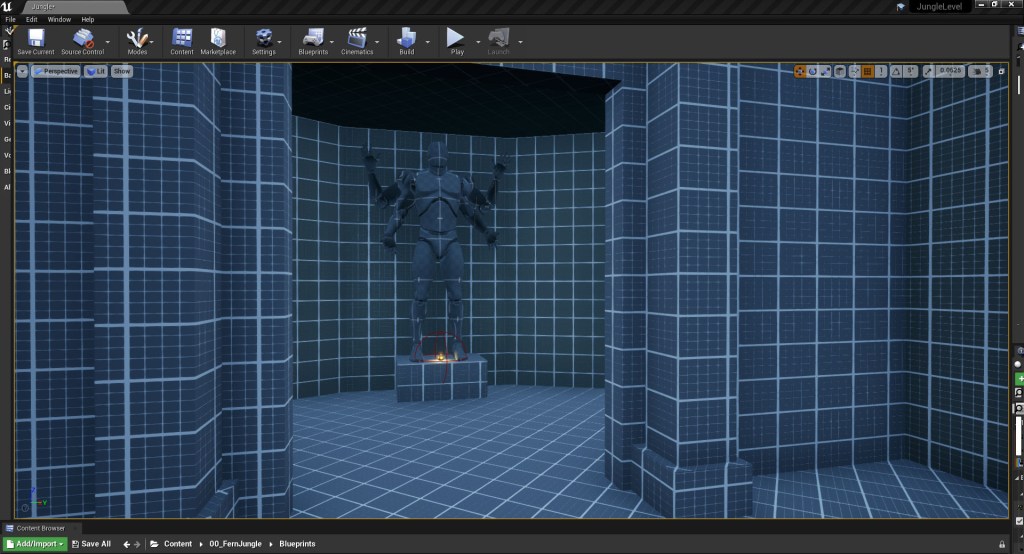
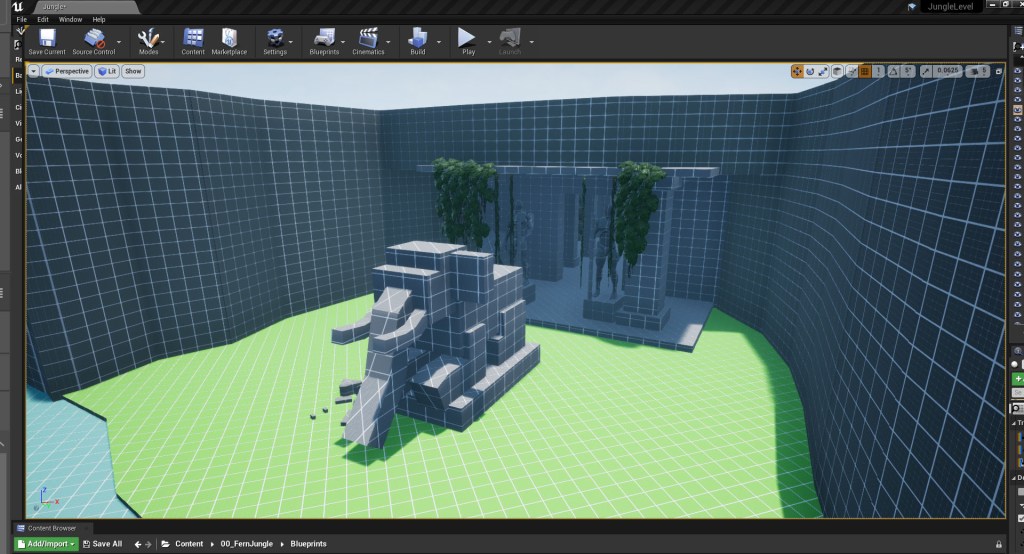
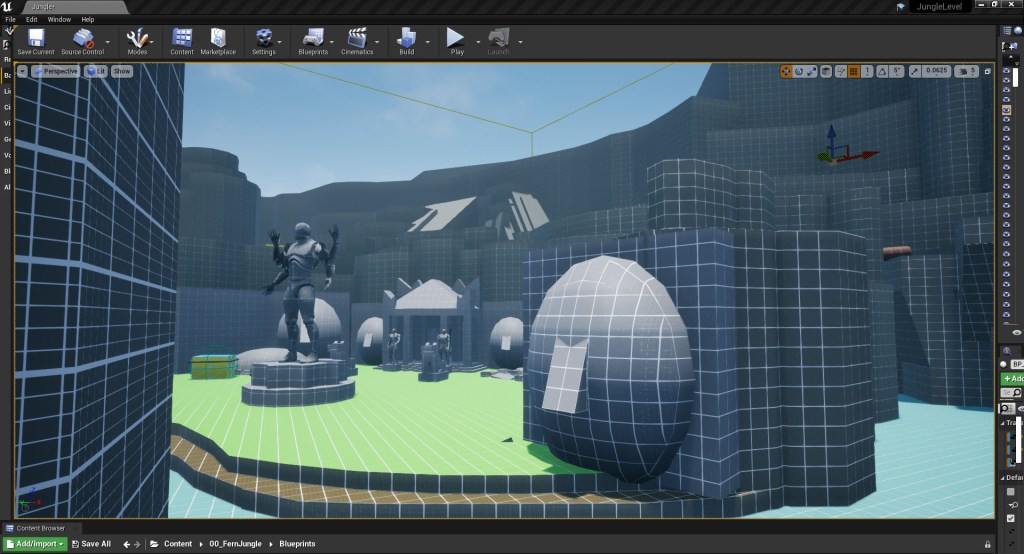
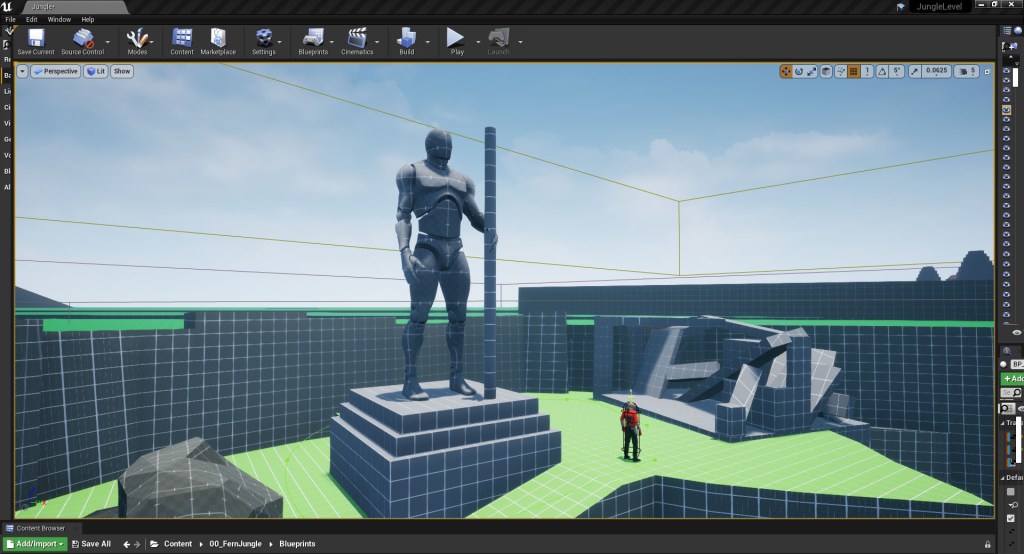
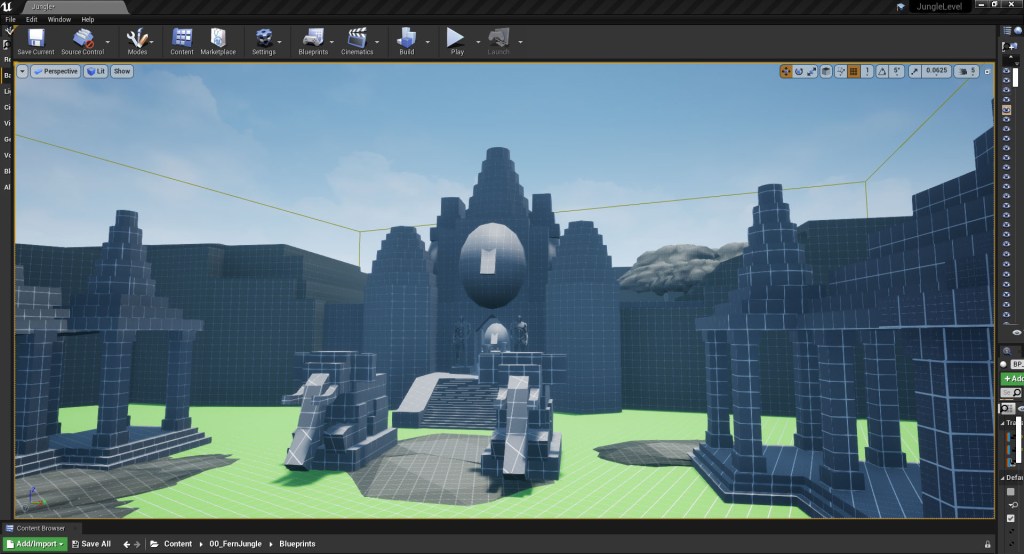
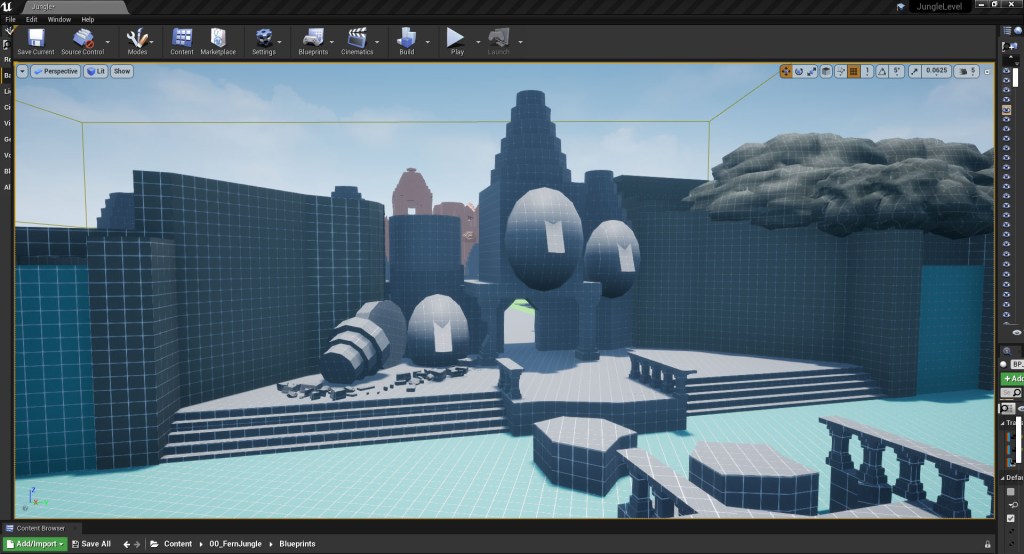
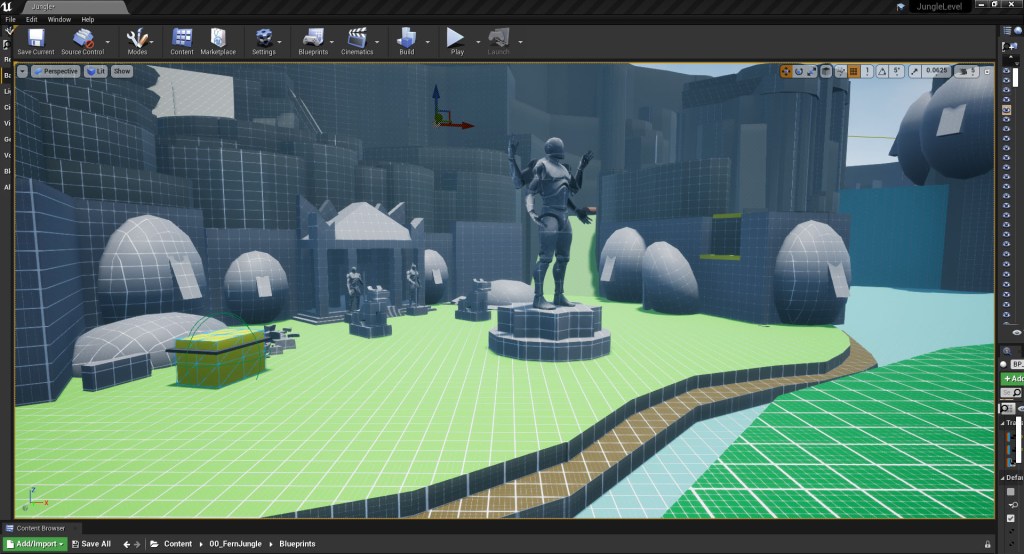
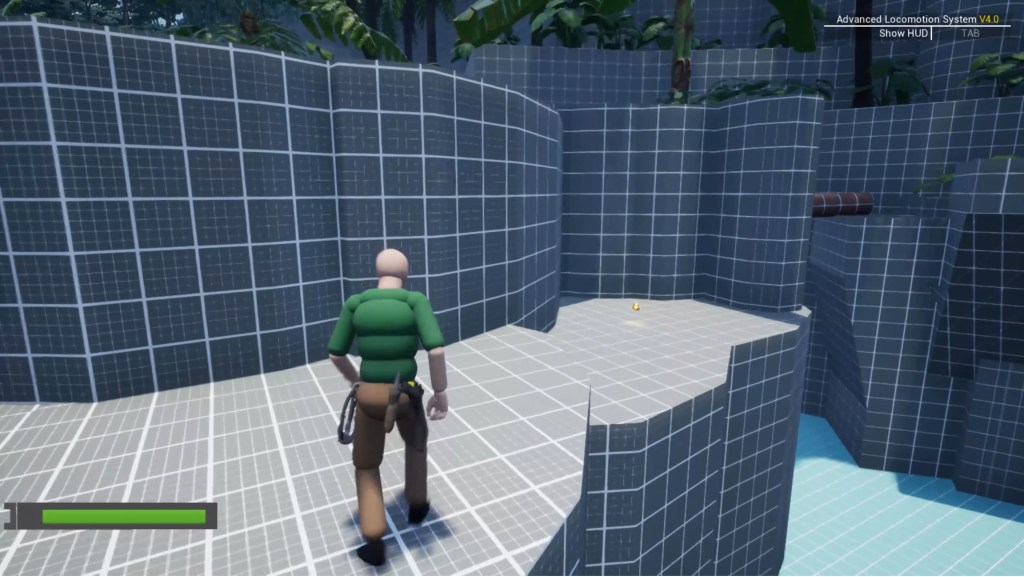
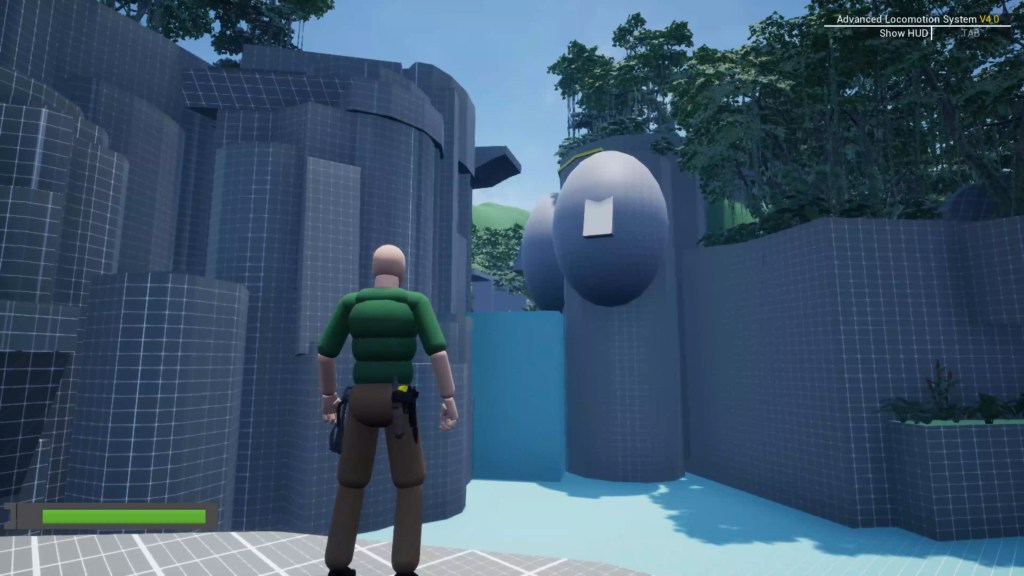
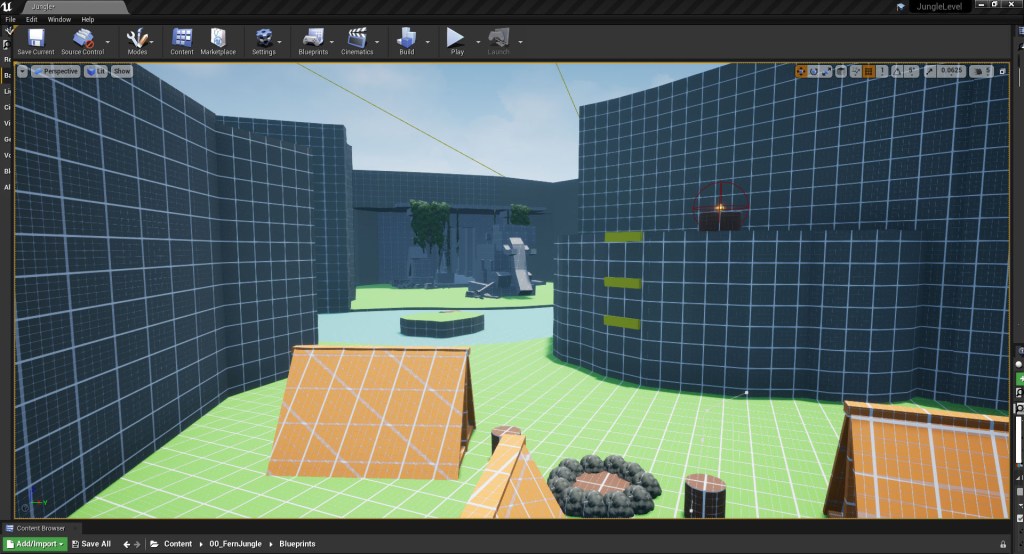
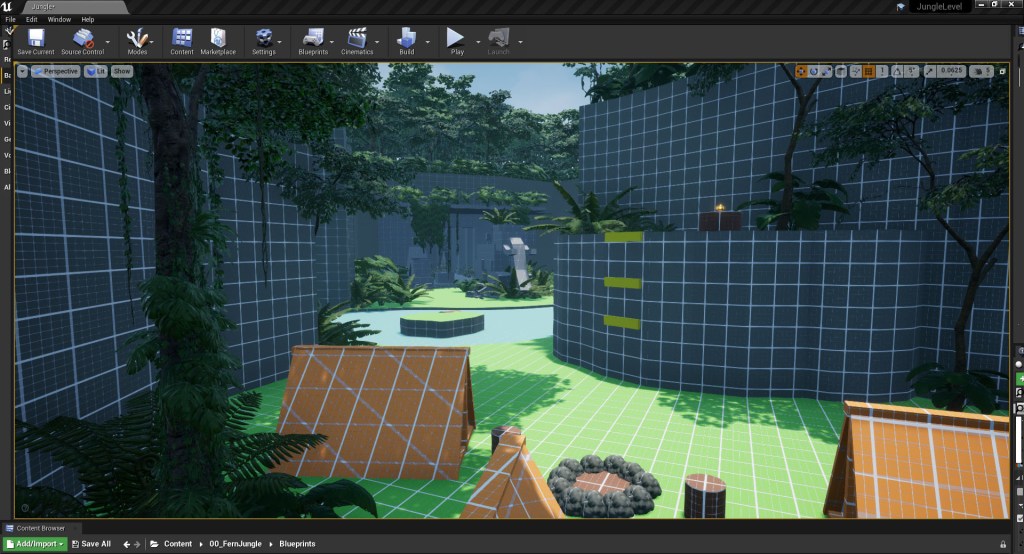
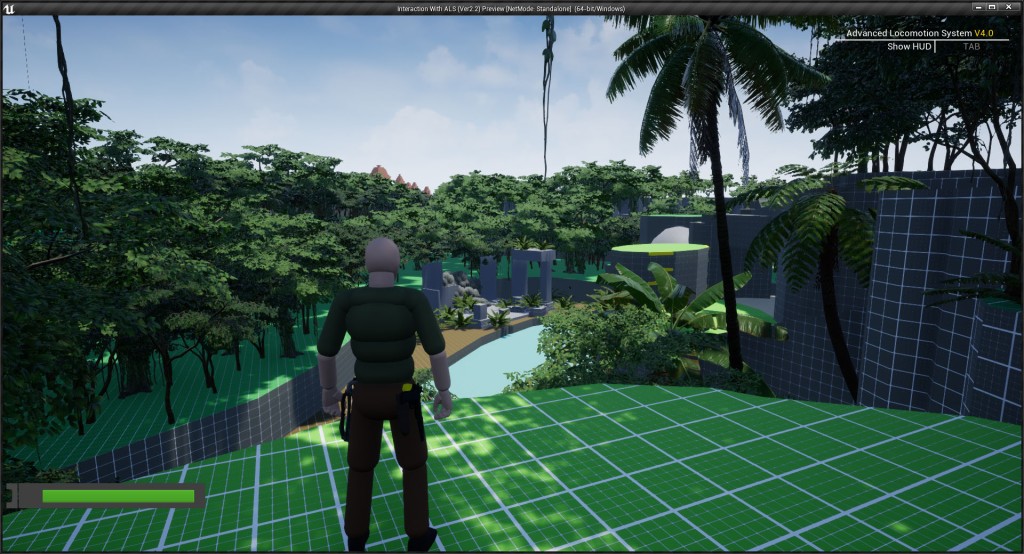
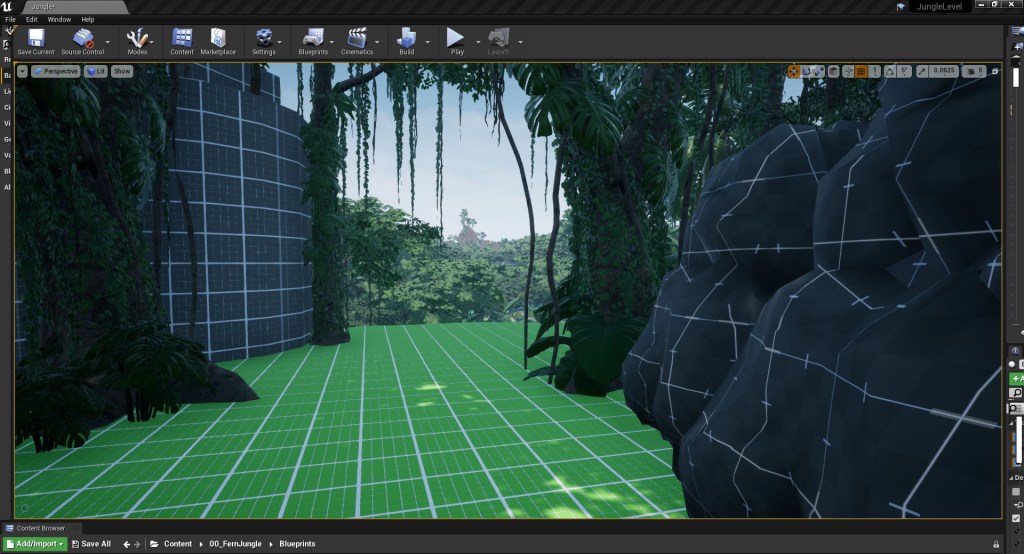
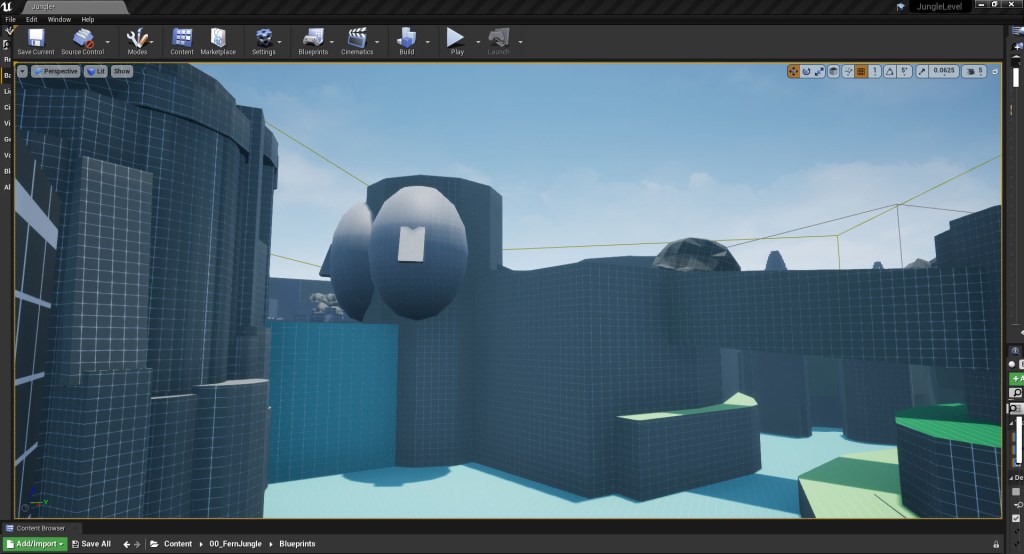
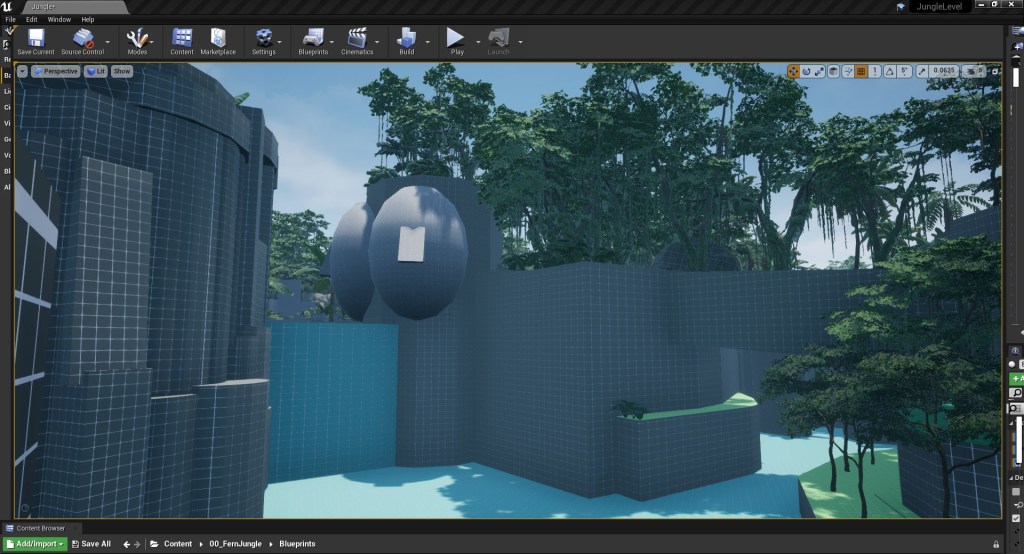
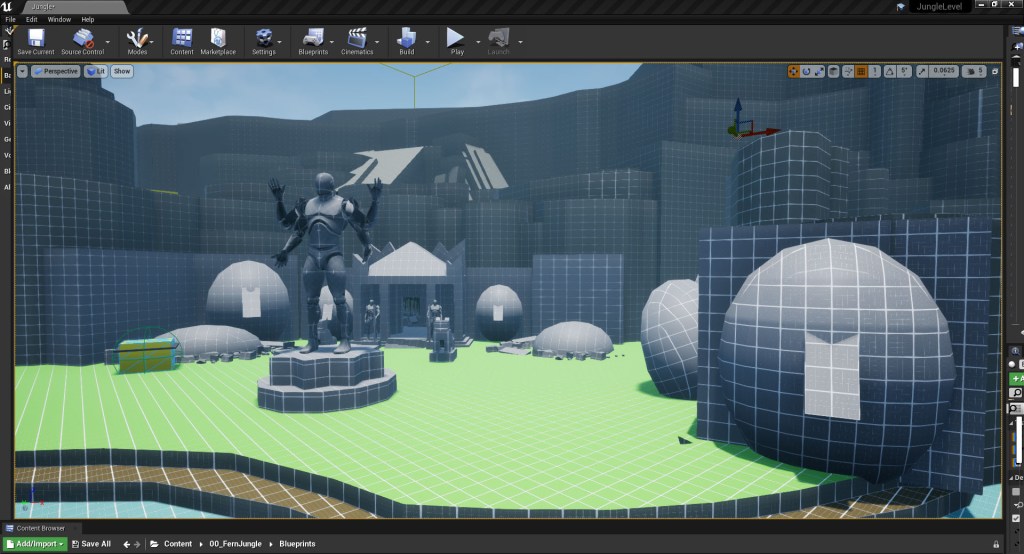
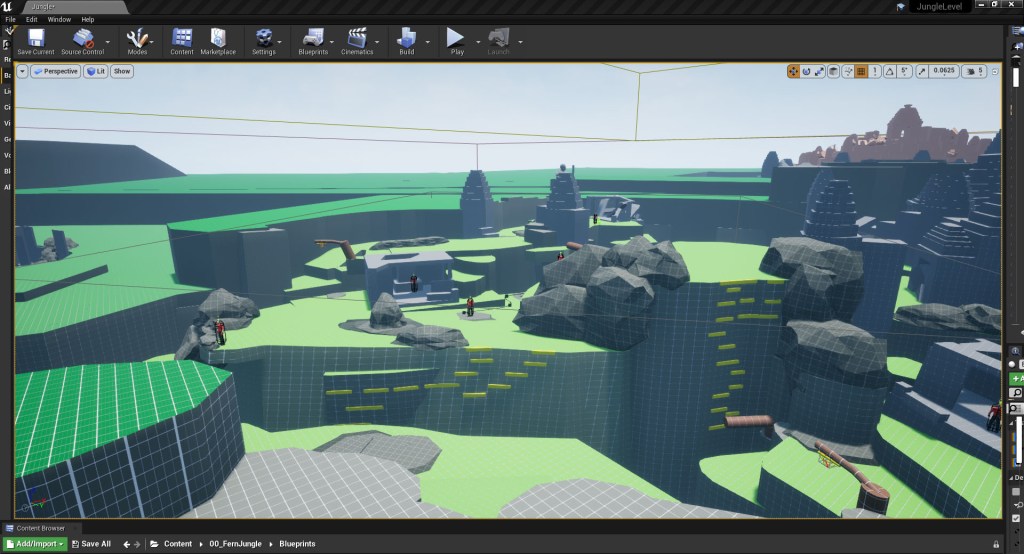
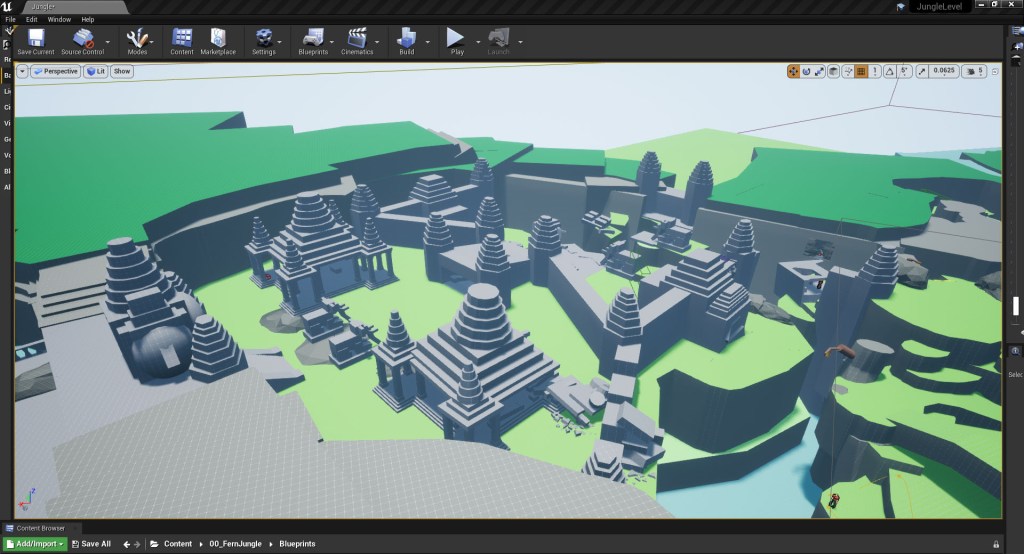
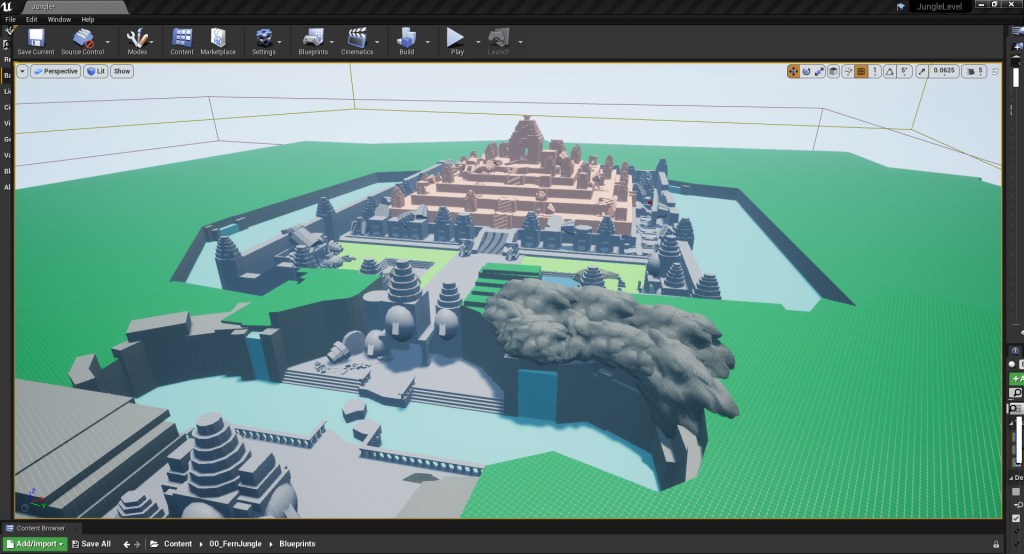
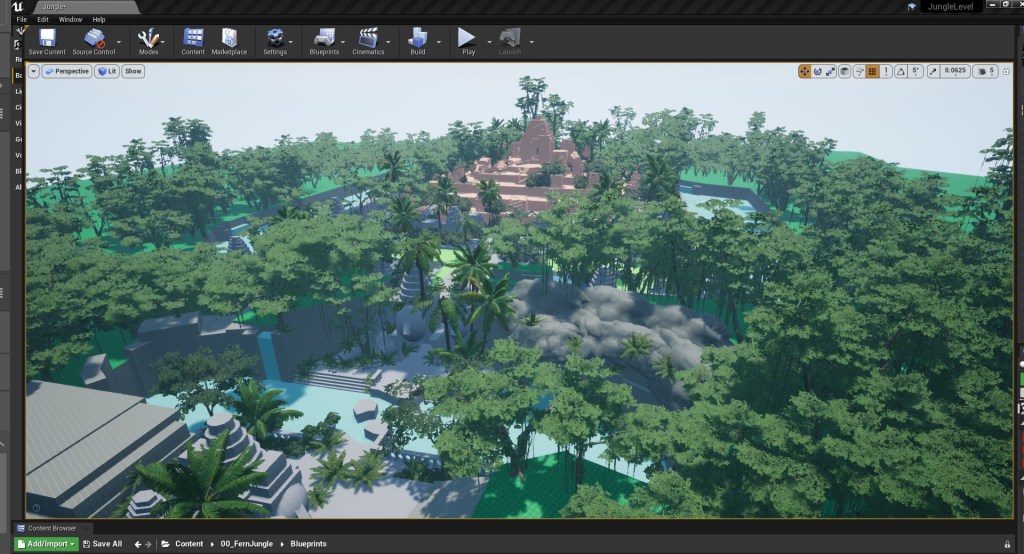
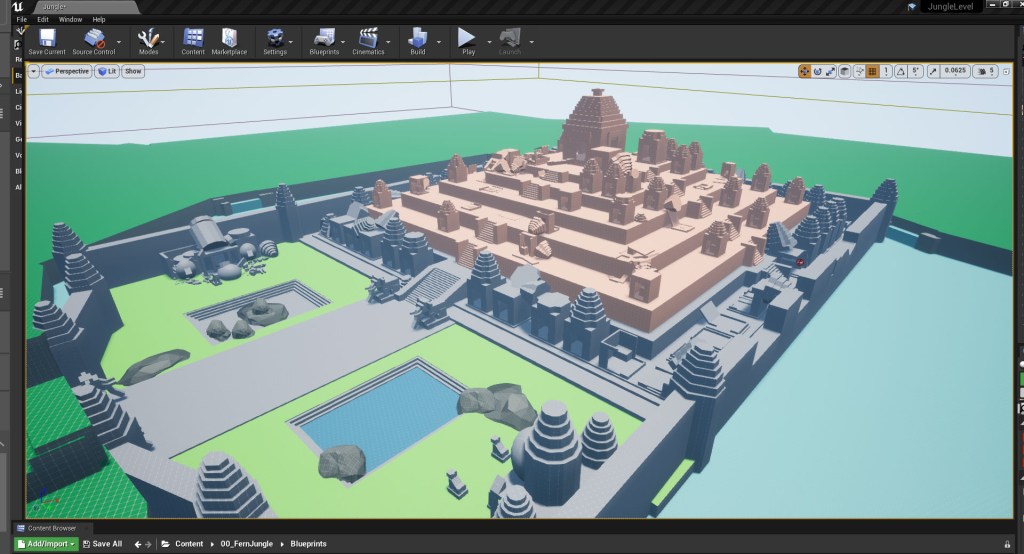
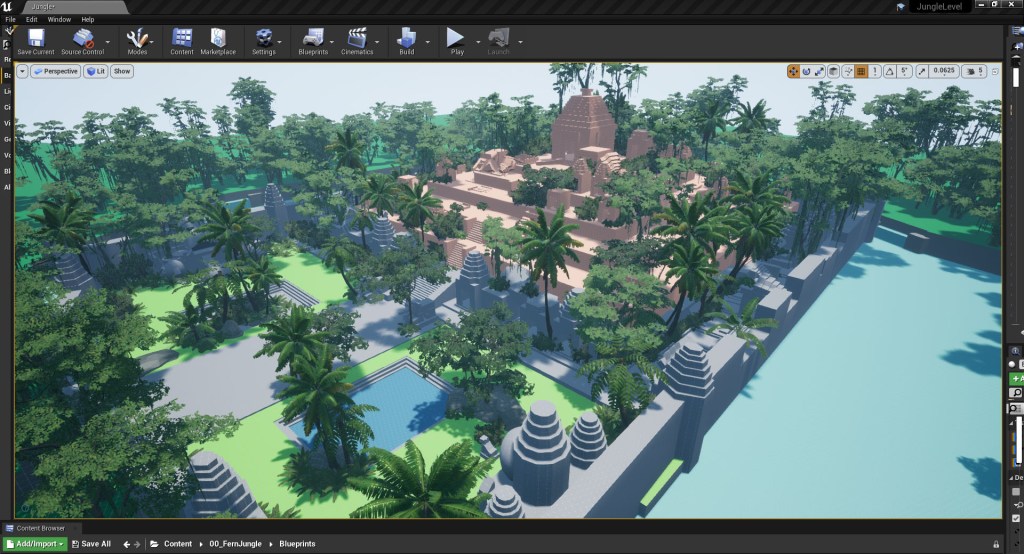
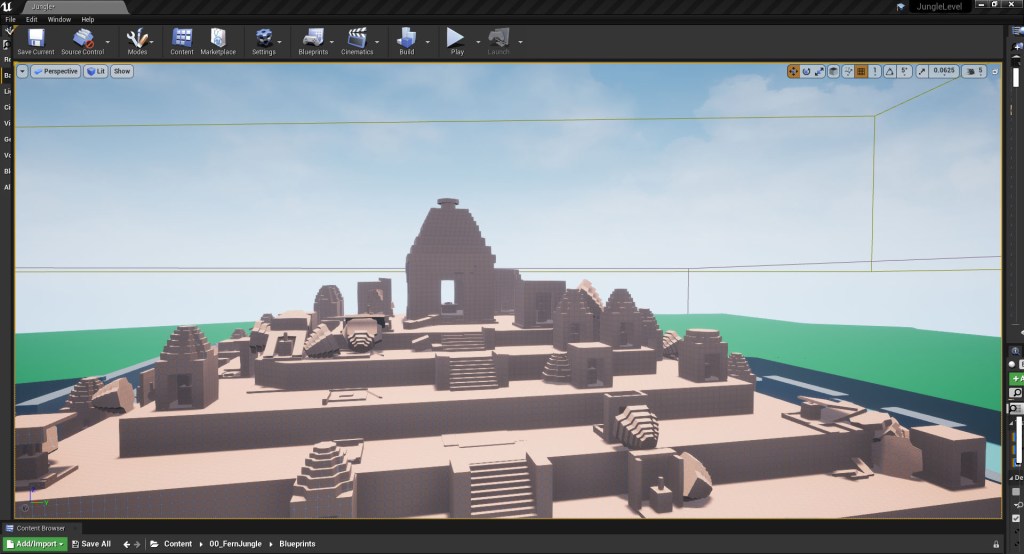
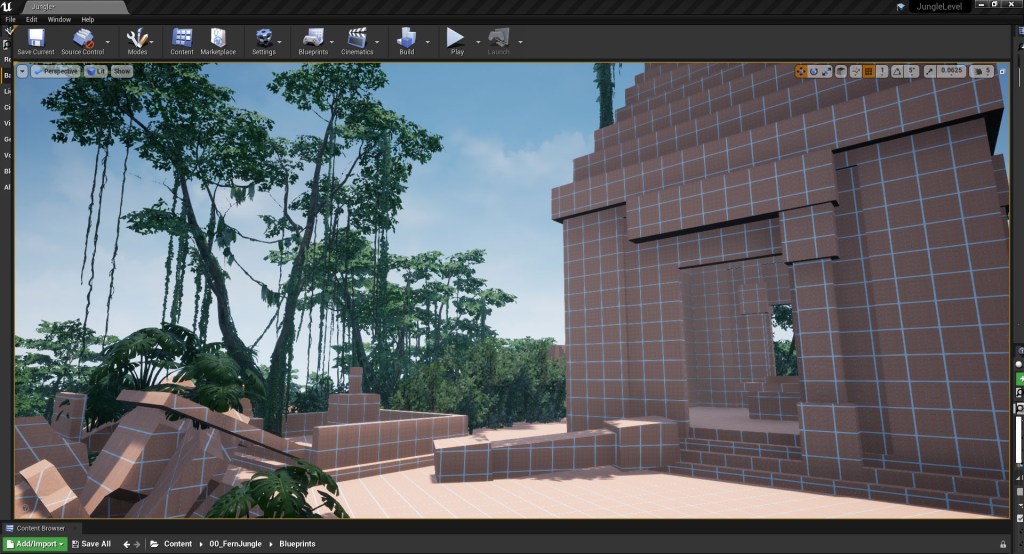
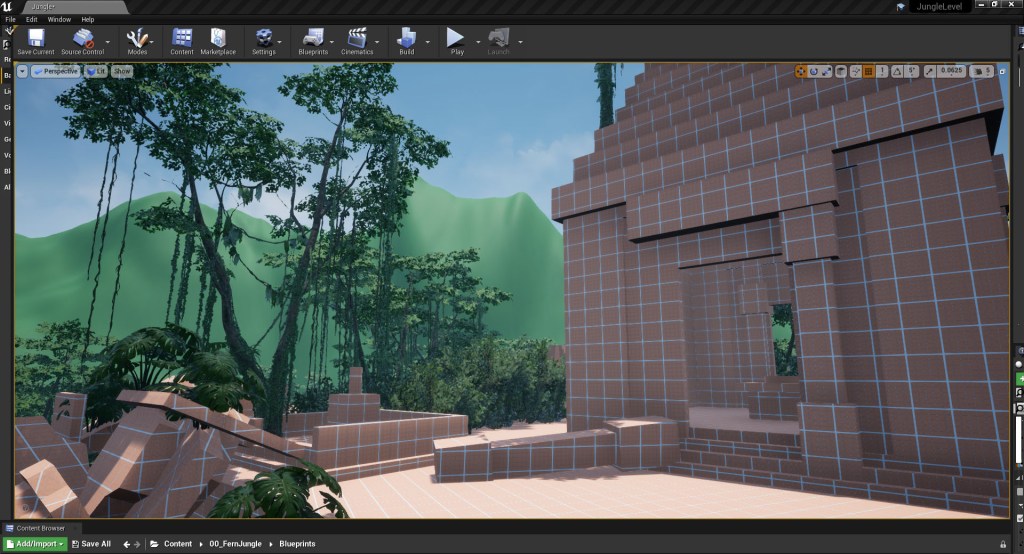
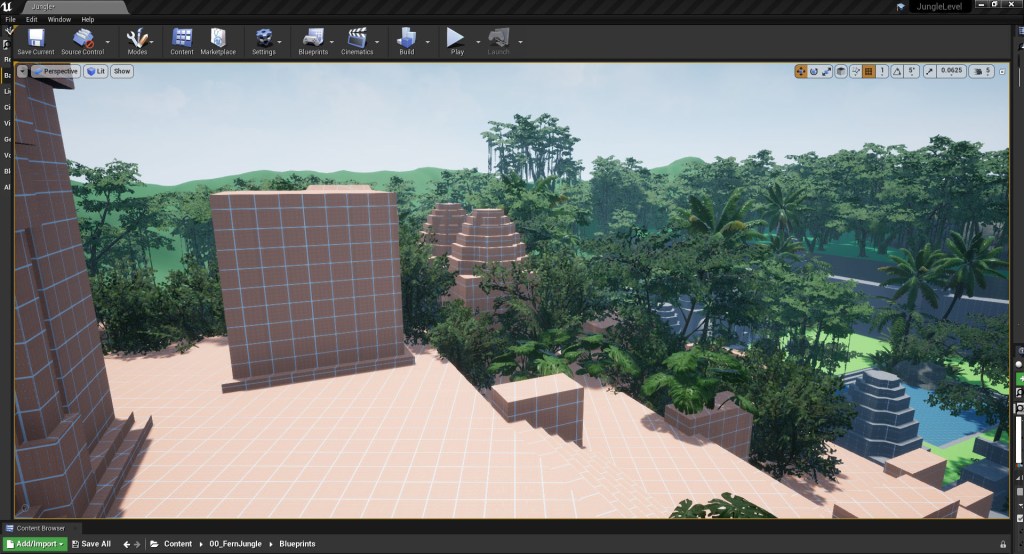
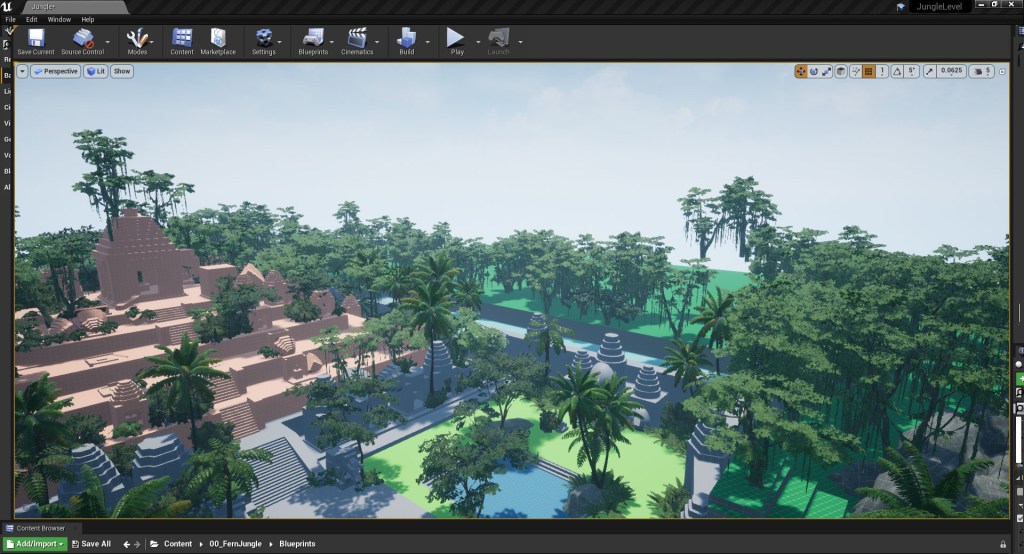
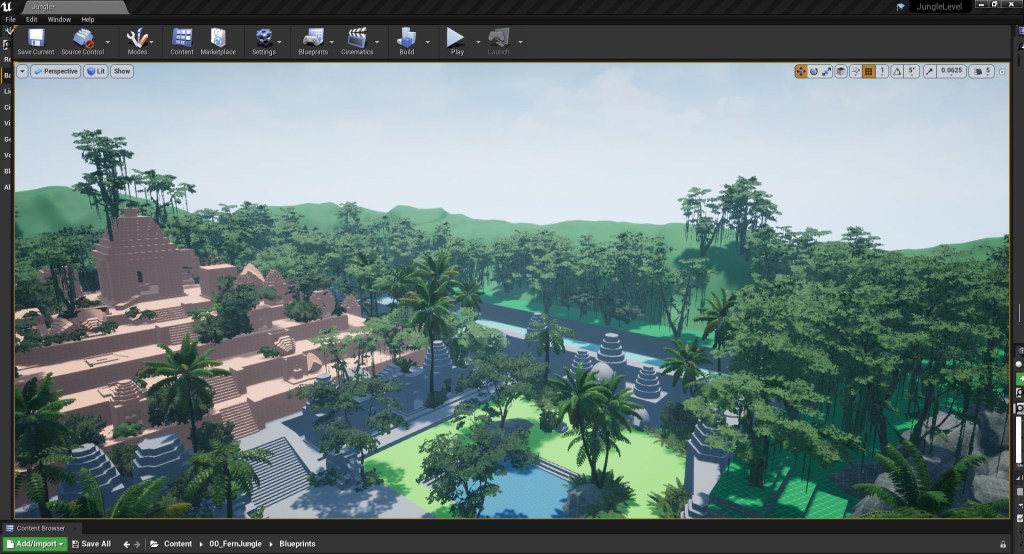
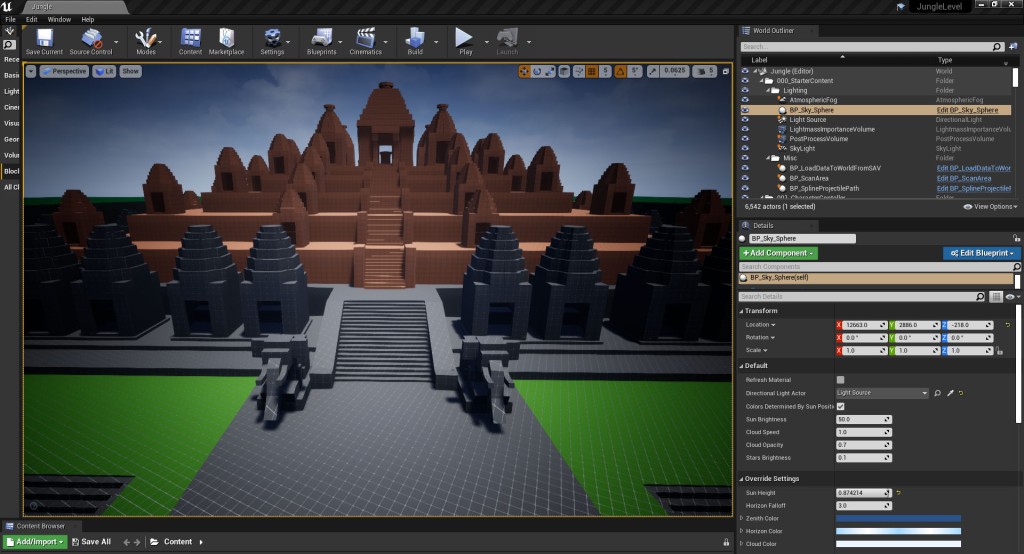
Some players where also finding it hard to understand the architecture in the temple areas as the shapes for the statues where very similar to theose used for pillars and walls as well as the natural structures like cliffs and rockfaces. As more details allow cognitive maps to form more easily I replaced the placeholder statues made with simple cylinders and cubes with more realistic human-shaped statues to create clearer, more readable landmarks that are much more easily distinguisable from the surrounding landscape (fig 2 – 9).
It was also clear from the playtesting that the foliage on the low island in the middle of the river wasn’t a good enough site blocker. Player where being spotted by the lone enemy on the cliff side but it was hard for the player to spot this enemey making this experience feel unfair and punishing. To prevent this from happening, I raised the island in this area to create a hard blocker, allowing players the opportunity to explore this area without the risk of being spotted.
From a previous tutorial sessions, it had been suggested that it could be a good idea to add an optional climbing area to this small temple that requires the player to use the pushable rock to get to it as a way (fig 10 – 11). I liked the idea of encouraging the player to spend more time in this section of the map as the player loops around the island in the center of the river making this river area an important district for players to form their cognitive maps around.
I added a collectable to the small rocky plateau that the player is able to see as they travel through the platforming section to the temple area (fig 12). Though they can see the collectible there is no obvious that they can initially get to it. When the player enters the temple area they see a climbable ledge that would take them around to the collectible but they are unable to reach it, presenting the player with a problem to solve (fig 13 – 14).
The player’s reward for solving the problem and utilising the pushable rock to climb up to a ledge is not only the collectable but a new view of the giant stone faces that they had previously traversed past (fig 15). By adding this optional section in the player is encouraged to spend longer in the space and is provide with additional information on the local landmark. By showing the two giant faces carved into the cliff of the waterfall from a different angle the player is able to work out where they are in relation to their pervious location, helping them to consolidate and better understand their cognitive map.

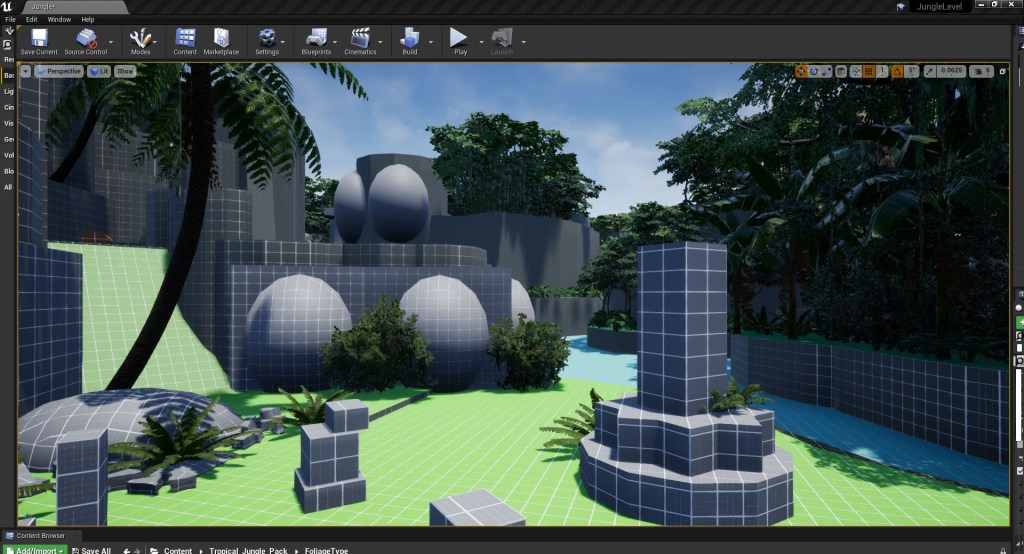
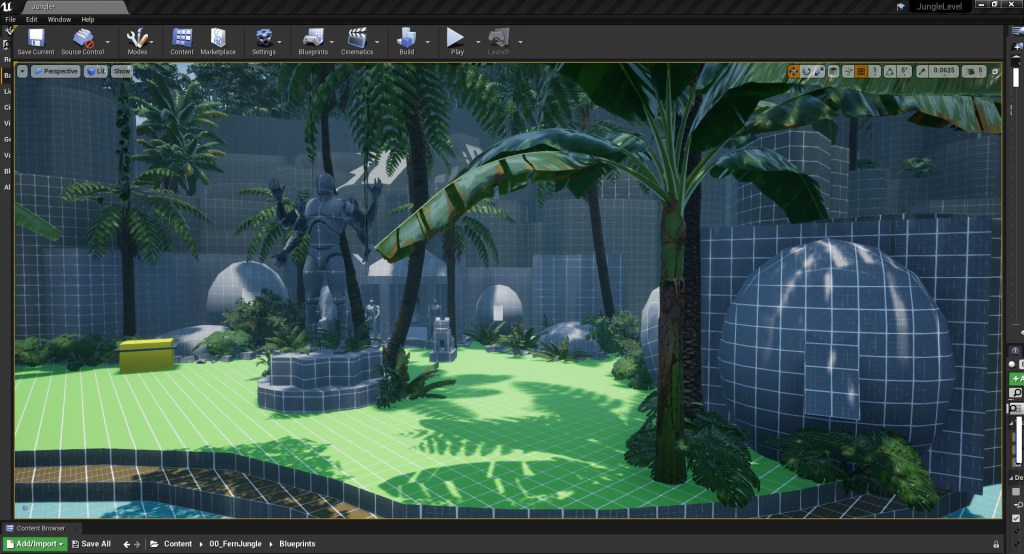
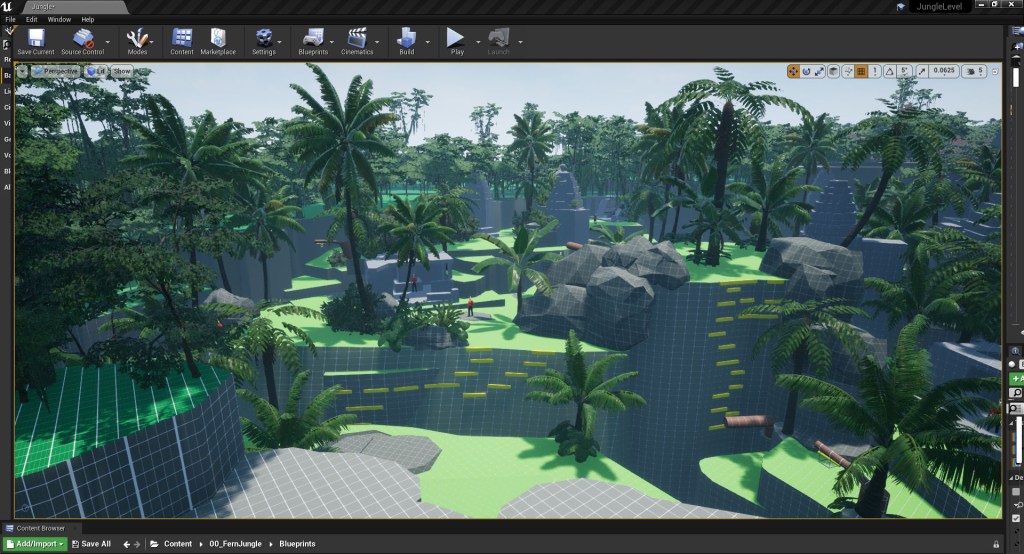
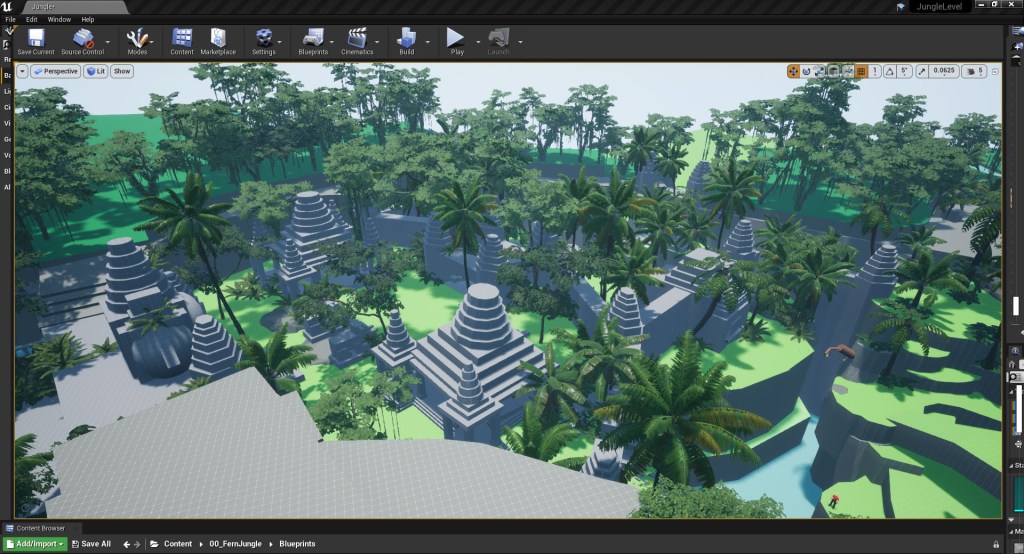
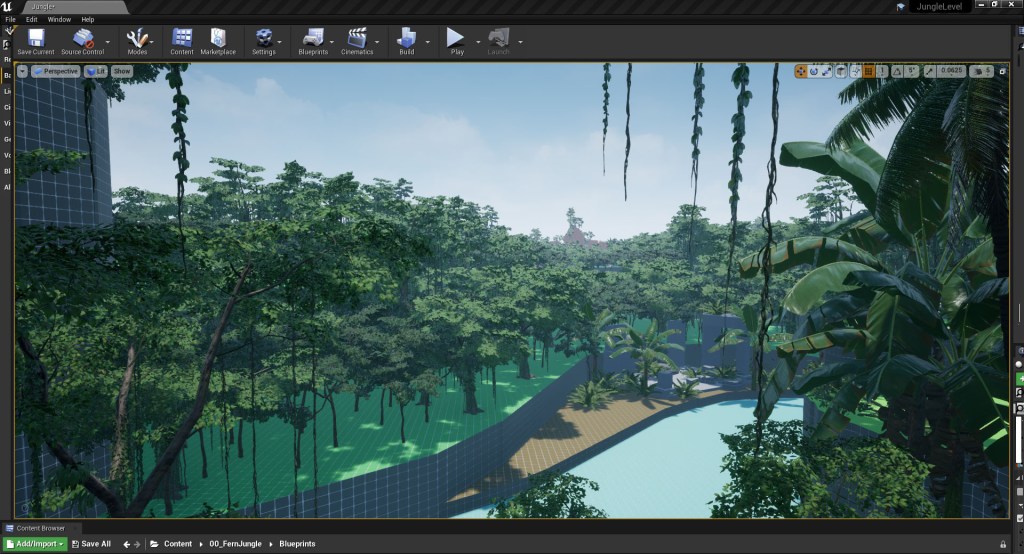
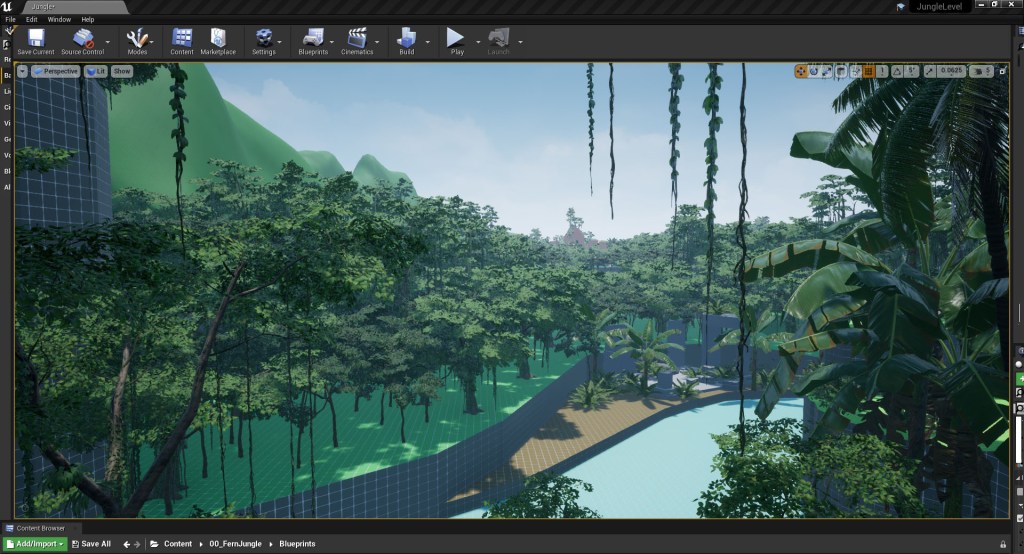
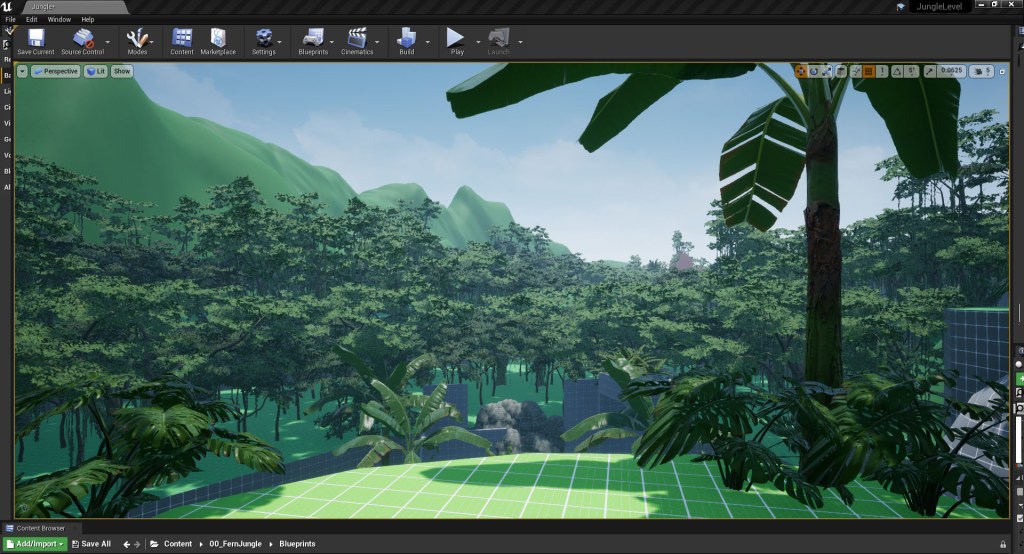
As I iterated on the different area of the level based off the player testing feedback I also reworked the foliage in these areas, with a stronger focus on using shadows, shapes and framing to help guide the player and draw their attention to specific area. In the start area I expanded on the existing light and shadows cast on the ground to imply a clearer path (fig 16 – 17). At the open area at the cliff top where the player is given their first glimpse of the temple I changed the foliage placement to only partially obscure the view while also framing it more effectively, guiding the players eye to the temple in the distance (fig 18 – 19).
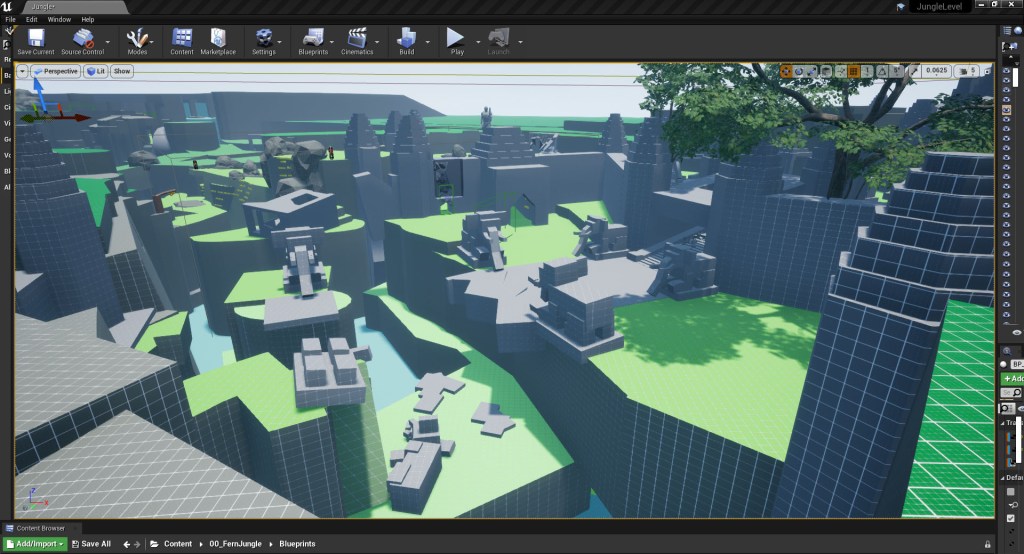
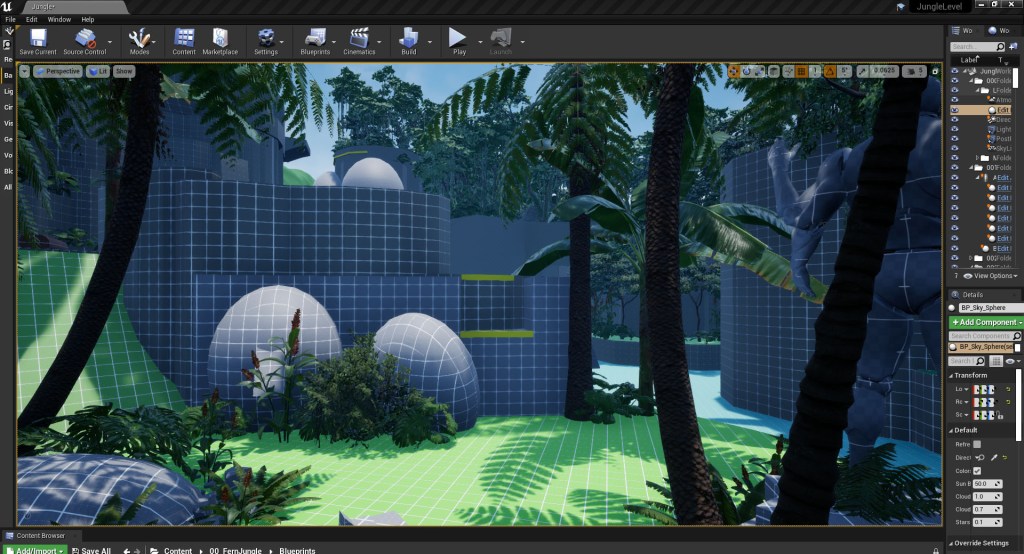
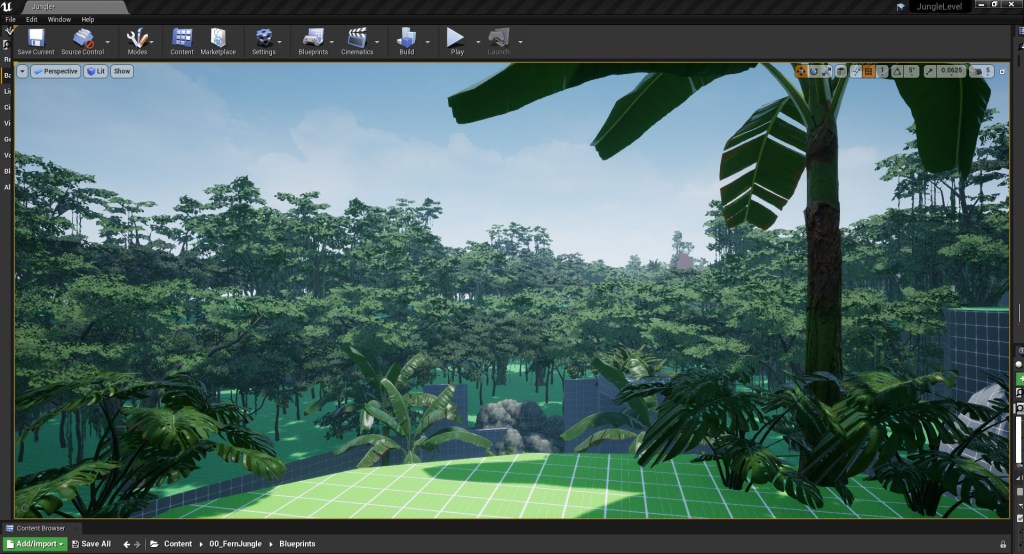
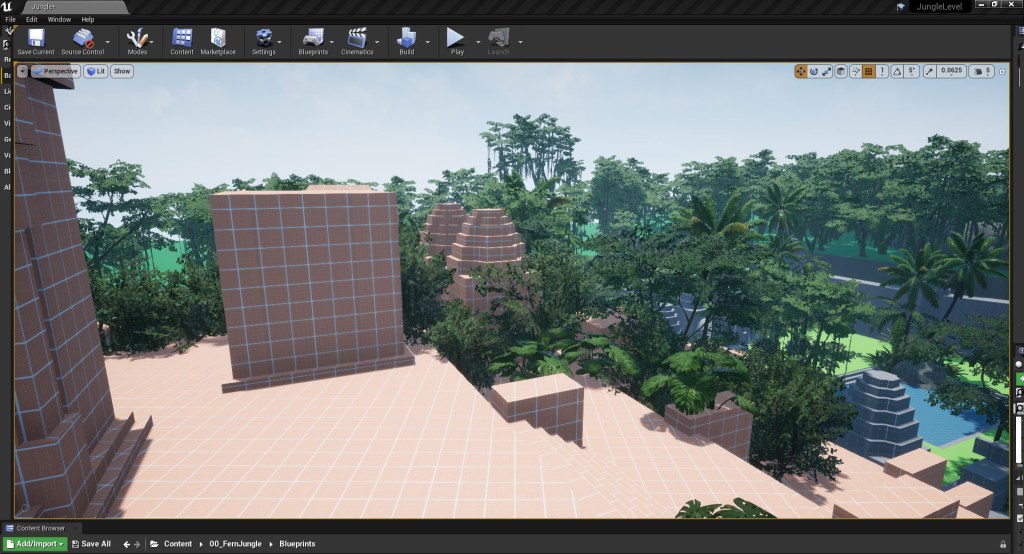
Else where in the level, I changed the foliage to create a better feeling of flow through the spaces, breaking up the openness of the paths and small hub areas and deliberately blocking the players sight lines by using the foliage to creating areas of negative space. Once I was happy with the reworked foliage in the first half of the level I moved on to second half of the level, using the same techniques and principles to create compositions and spaces that gently guide the player forward (fig 20 – 37). I also started adding in some invisible collision blockers around the cliff faces to smooth the collisions and prevent players from getting stuck in areas they shouldn’t be able to enter. To make it easy for me to see where I had placed these collisions I set them to be visible in the view port and set them to be a bight, translucent purple colour so I can track which areas I had done a smoothing pass on.

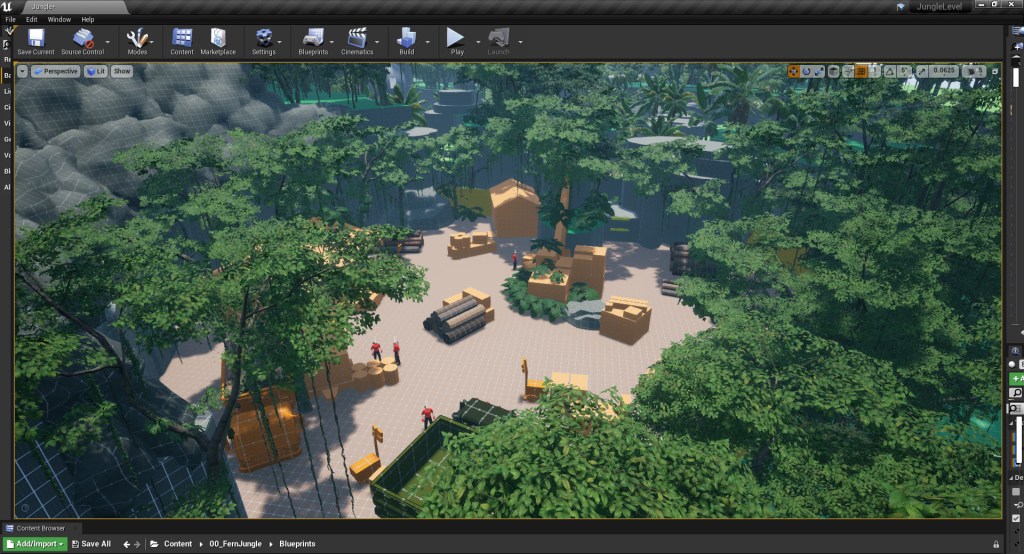


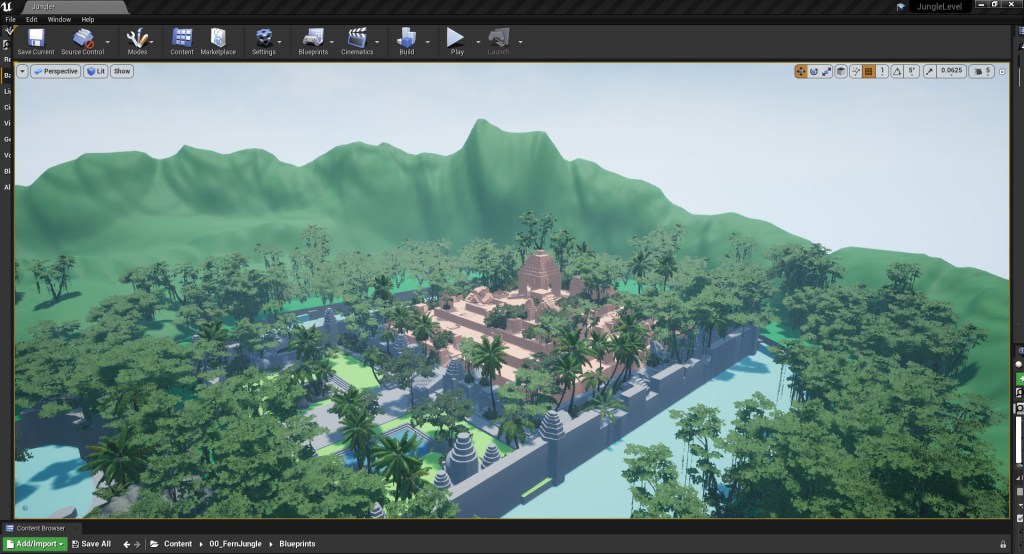
As the level is fairly big, and I am placing a lot of foliage, I decided to cap the maximum texture resolution at 1048 rather than leaving them at the default 4K resolution. While this did help I felt I could improve the performance even more by reducing the amount of overall foliage in the level. I had been using the foliage as a way to block sight lines and form the boundaries of the level in quite a few areas so I removed the density of foliage in this area and added in a landscape layer in stead (fig 38 – 49). Adding the landscape layer and not only helped to improve performance but helped to better capture the nature and feel of Virachey National Park’s largely unexplored mountainous lanscape with dense jungle, waterfalls and and deep river gorges.

Once I was happy with the landscape and vegetation pass I went back to the start of the level to look at how to make the first vista point more enticing to the players. During playtesting I had noticed that a lot of players didn’t spend too long looking over the level from this vista point and that some were missing the vista entirely which meant they were missing the first opportunity to orientate themselves in the space by seeing important landmarks like the temple. As part of the foliage and landscape pass I brought the cliffs on the left forward more and used the foliage to framed the vista to guide the players eye and highlight the temple, the players final destination in the center of the screen (fig 50).
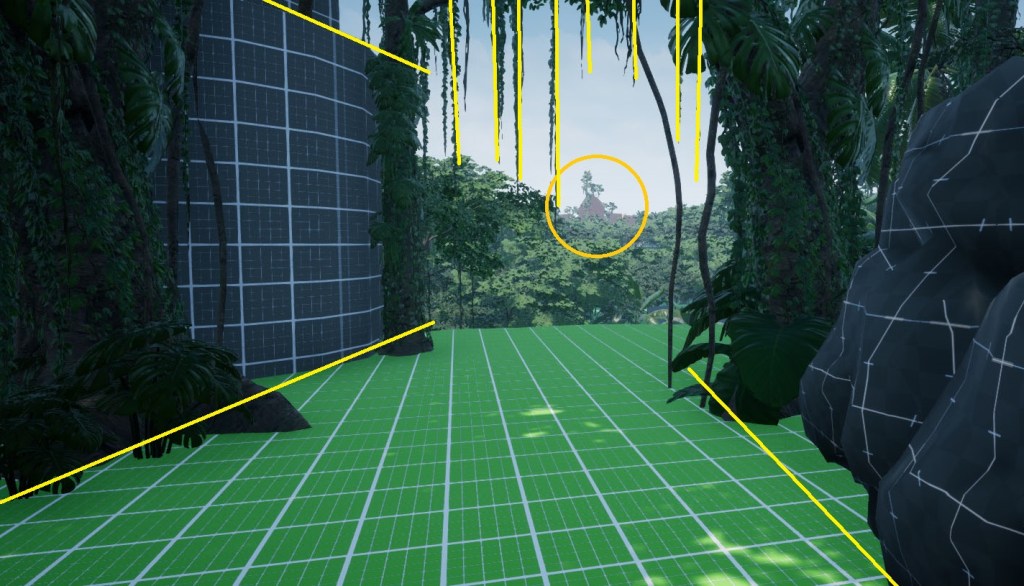
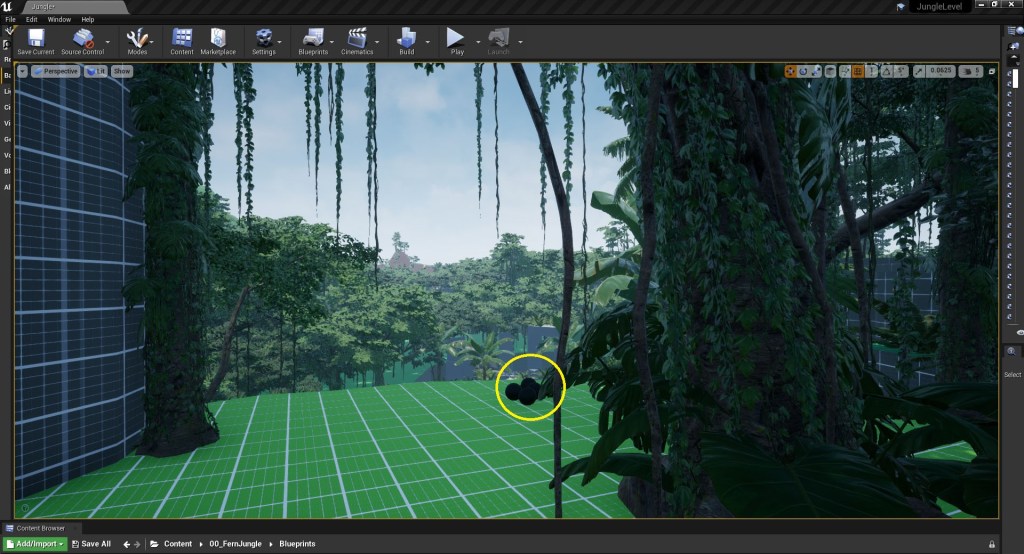
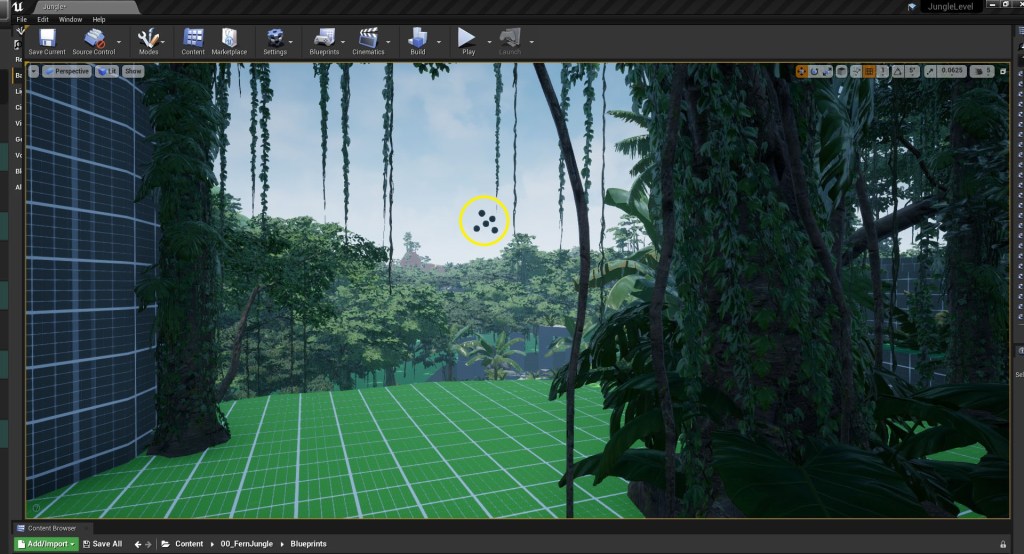
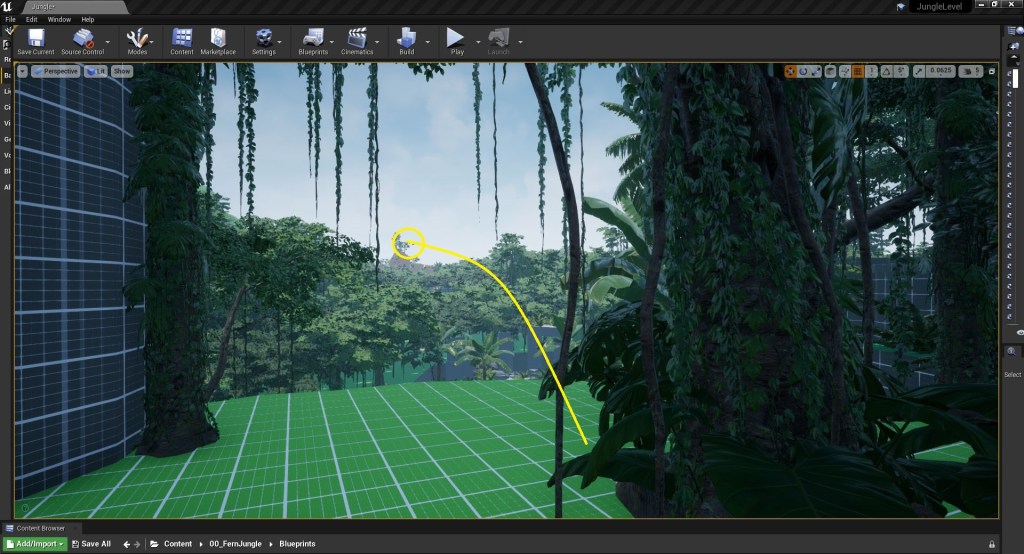
While the framing did help focus the player attention on the temple in the background I wanted something that more directly drew the players attention to the temple in the background. Up until now I’d been using light and colour to guide the players attention so here I wanted to try adding in movement and sound. I decided to roughly prototype some birds flying off from the ground as the player approached the vista, with the birds flying off into the distance guiding the players attention directly to the temple peaking out behind the trees in the distance (fig 51 – 53).
As I didn’t have an animated bird model, and the focus off this project is level design and not animation, I prototyped this using some small, black spheres. Using black spheres to represent the birds flying off meant I was able to utilise movement, drawing the players eye to the important location in the background, without having to spending too much time on the prototype. To help communicate that these small blak spheres are birds, I added in a sound effect of birds taking off (Glaneur de sons) which also help draw the players attentiom to the spheres, contextualising them as birds which guides the players eyes to the temple in the distance.
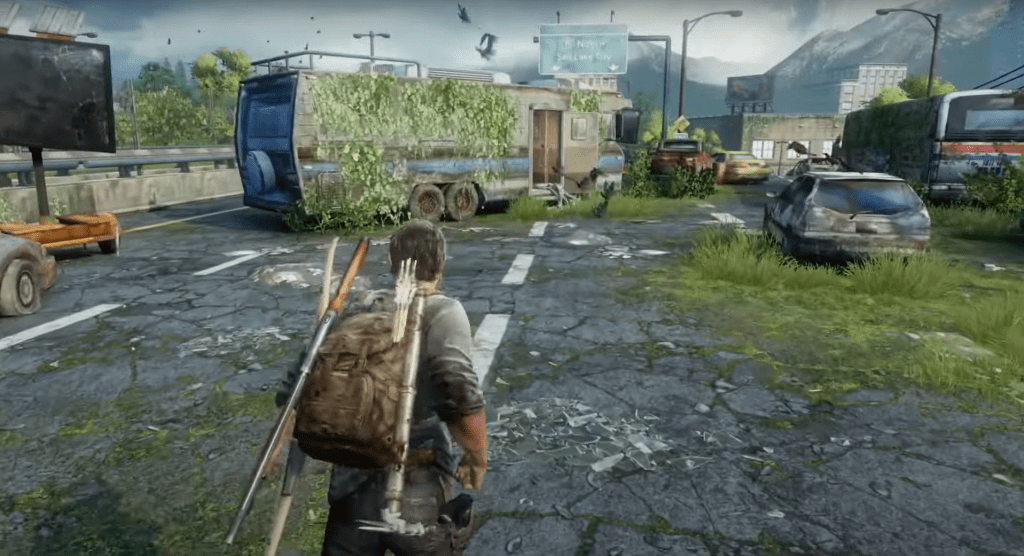
Using movement of flying birds to draw the players attention to something important in the scene is a technique I borrowed from Peter Field who used the same technique in The Last of Us (2014) to draw the players attention to the caravan on the Highway Exit of the Bus Depot chapter so using the techniques was a nice little reference to one of my favourite video games.
I really liked how the two scripted events have add life to the level and made it feel like the player was having an impact on the world with the birds flying off as the player approaches them and the cliff face collapsing as the player jumps across it. I decided to added in an additional scripted event to continue to show the impact the player is having on the world.
With the bird happening at the beginning of the level, and the cliff collapse at the middle point I decided to add the third scripted moment towards the end of the level. To prevent the player from back tracking I decided to add a moment where a section of wall collapse after the player crawls through into the main temple structure, which not only adds some visual interest for also audio as I added in some tumbling rocks (Fission9) sound effects . These scripted moments not only add interest to the level but are also a useful tool for helping players understand where they are in the space. If the player can see they are having an impact on the world they are more invested in the space and as a result this leds to them building more detailed and accurate cognitive maps.
My last planned task for this week was to add in ambience as sound is such a key part of how players experience a game and really help to sell a location. I layered some different audio files together to create a long single file that loops indefinitely that helps to immerse the player in the Cambodian jungle. The sound effects that I used were:
- 12 Hours Night Choruses of a Flatwoods Pond (KevinSonger)
- Bird Whistling (InspectorJ)
- Pajaro Pucallpa (Universildo)
- Black Casqued Hornbill (ERH)
- Monkey Jungle (Soundbytez)
Finally I tested the build, making use the level complied correctly and then record a first draft of the playthrough so I can make sure everything was working correctly as well as easily review the level as a whole as I head towards the final week of development.
“Don’t wish it were easier, wish you were better.”
Chief – Animal Crossing
References:
ERH. “Black Casqued Hornbill” Freesounds [Sound effect] Available at: https://freesound.org/people/ERH/ [Accessed 14th August 2022].
FISSION9. “Tumbling Rocks” Freesounds [Sound effect] Available at: https://freesound.org/people/Fission9/sounds/488660/ [Accessed 14th August 2022].
GLANEUR DE SONS. “Pigeons taking off” Freesounds [Sound effect] Available at: https://freesound.org/people/Glaneur%20de%20sons/sounds/104954/ [Accessed 14th August 2022].
INSPECTORJ. “Bird Whistling” Freesounds [Sound effect] Available at: https://freesound.org/people/InspectorJ/ [Accessed 14th August 2022].
KEVINSONGER. “12 Hours Night Choruses of a Flatwoods Pond” Freesounds [Sound effect] Available at: https://freesound.org/people/KevinSonger/ [Accessed 14th August 2022].
SOUNDBYTEZ. “Monkey Jungle” Freesounds [Sound effect] Available at: https://freesound.org/people/soundbytez/ [Accessed 14th August 2022].
UNIVERSILDO . “Pajaro Pucallpa” Freesounds [Sound effect] Available at: https://freesound.org/people/universildo/ [Accessed 14th August 2022]
Figures:
Figure 1: Updated 2D level map
Figure 2: Screengrab from Jungle level blockout
Figure 3: Screengrab from Jungle level blockout
Figure 4: Screengrab from Jungle level blockout
Figure 5: Screengrab from Jungle level blockout
Figure 6: Screengrab from Jungle level blockout
Figure 7: Screengrab from Jungle level blockout
Figure 8: Screengrab from Jungle level blockout
Figure 9: Screengrab from Jungle level blockout
Figure 10: Screengrab from Jungle level blockout
Figure 11: Screengrab from Jungle level blockout
Figure 12: Screengrab from Jungle level blockout
Figure 13: Screengrab from Jungle level blockout
Figure 14: Screengrab from Jungle level blockout
Figure 15: Screengrab from Jungle level blockout
Figure 16: Screengrab from Jungle level blockout
Figure 17: Screengrab from Jungle level blockout
Figure 18: Screengrab from Jungle level blockout
Figure 19: Screengrab from Jungle level blockout
Figure 20: Screengrab from Jungle level blockout
Figure 21: Screengrab from Jungle level blockout
Figure 22: Screengrab from Jungle level blockout
Figure 23: Screengrab from Jungle level blockout
Figure 24: Screengrab from Jungle level blockout
Figure 25: Screengrab from Jungle level blockout
Figure 26: Screengrab from Jungle level blockout
Figure 27: Screengrab from Jungle level blockout
Figure 28: Screengrab from Jungle level blockout
Figure 29: Screengrab from Jungle level blockout
Figure 30: Screengrab from Jungle level blockout
Figure 31: Screengrab from Jungle level blockout
Figure 32: Screengrab from Jungle level blockout
Figure 33: Screengrab from Jungle level blockout
Figure 34: Screengrab from Jungle level blockout
Figure 35: Screengrab from Jungle level blockout
Figure 36: Screengrab from Jungle level blockout
Figure 37: Screengrab from Jungle level blockout
Figure 38: Screengrab from Jungle level blockout
Figure 39: Screengrab from Jungle level blockout
Figure 40: Screengrab from Jungle level blockout
Figure 41: Screengrab from Jungle level blockout
Figure 42: Screengrab from Jungle level blockout
Figure 43: Screengrab from Jungle level blockout
Figure 44: Screengrab from Jungle level blockout
Figure 45: Screengrab from Jungle level blockout
Figure 46: Screengrab from Jungle level blockout
Figure 47: Screengrab from Jungle level blockout
Figure 48: Screengrab from Jungle level blockout
Figure 49: Screengrab from Jungle level blockout
Figure 50: Screengrab from Jungle level blockout
Figure 51: Screengrab from Jungle level blockout
Figure 52: Screengrab from Jungle level blockout
Figure 53: Screengrab from Jungle level blockout
Figure 54: Screengrab from The Last of Us: REMASTERED showing Highway Exit of the Bus Depot chapter
Figure 55: Video of blockout time laps
Figure 56: Video of level playthrough
Games
The Last of Us: REMASTERED. 2014. Naughty Dog, Sony Interactive Entertainment.

Leave a comment